How did I set up this very blog!
The bumpy road I experienced to set up this website-based blog.


I found Hostinger the overall best solution, as it's quite affordable and includes the advantages I will soon mention.
Another property of your Website is that it must have a name. This name is there for other users of the internet to find on the internet, and it's called "domain". Guess what, also domains are out for sale. There are several platforms where you can check the availability of domains, and I suggest checking the availability during the search of your blog's name.
One advantage of Hostinger is that if you buy hosting through their platform, they give you a domain for free. So we can say, the domain is included in the hosting fee.
Good, we are almost there, now the actual website is missing. To MAKE a website, you can either code it from scratch or use website drag-and-drop builders. As I can't code nearly as well to make a decent website, I chose a drag-and-drop option. Of course, also here there are plenty of website builders out there.
There is no one-size-fits-all solution, some builders are better in case you want to open an e-commerce platform, others are great for very complex applications and others are good for static websites (that you can't modify after you make it).
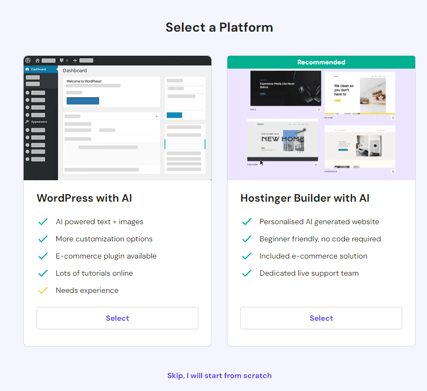
Hostinger is so nice that inside the hosting platform, has two built-in functions, to make a website, either with WordPress or with... Hostinger!. WordPress.org (not WordPress.com!) is by far the most widely used website builder. Hostinger has its own website builder, quite simple and intuitive.
So, let's go to the step-by-step guide on how to set up your blog on Hostinger.
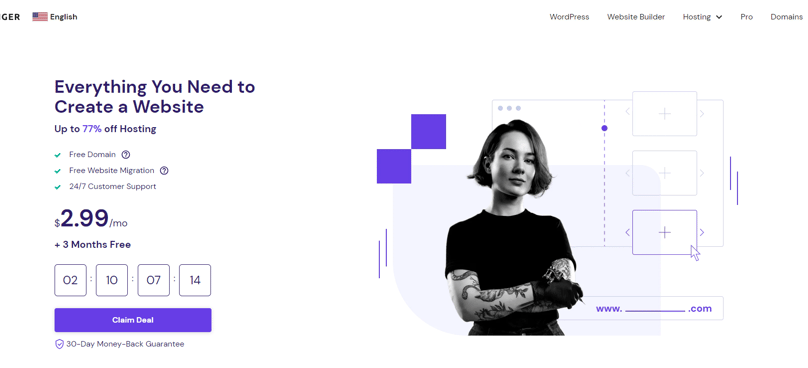
First, click "Claim Deal" on the page below, there's always a deal to claim.
Welcome everyone to my very first blog post and thanks for trusting that my debatable writing skills will entertain or help you in your purpose.
I thought that the best way to start a blog would be to explain step by step how I set up this very blog. This hopefully will save you some time and some headaches.
Looking at step-by-step guides, on YouTube, ChatGPT, and other blogs, you name it, I always found the same suggestions: define your niche, audience, topic, blogging platform (whether your own website or a third-party platform), etc., etc., etc... These are clearly very valuable information, but the scope of this post is to go into the nitty-gritty of the process of how I opened this (website-based) blog so that if you want to open something similar, you can follow this process step-by-step. So, let's start. None of the services I mention sponsor me, I am just reporting what I did.
Firstly, just a little explanation of how websites work. Websites are a set of pages accessible from the internet. The Internet is a vast pool of computers INTERconnected among each other and accessible from our own computers. The first thing we need to understand is that we need to find a spot for our website in this network of computers. "Spots" on the internet are out for rent, and it's called "hosting". Once I understood that, I looked for hosting providers, and I finally chose the most convenient for my case: Hostinger.
In the next step, you can choose whether to use Wordpress or Hostinger Builder. I recommend Hostinger builder as more beginner friendly. Once selected, you can buy or claim a your domain.
Here you go, you're good to go! Hostinger offers an AI-supported website builder, which means you write down a short description of how you would like your website to look and it automatically builds it for you. You can also start from other pre-existing templates, divided by category, and build on them. Unless you're a web designer, I don't recommend starting it from scratch. AI and available templates are gorgeous, pick one and build from that.
In the beginning, building a website is a bit tricky, you would need to understand the logic of how to architect it. But after a few days of persisting, you'll find your design and how to add your blog posts, to finally publish them!
Starting a blog is both an art and a science. While the technical steps are straightforward, the art lies in your content, engagement, and dedication to the craft. Happy blogging!

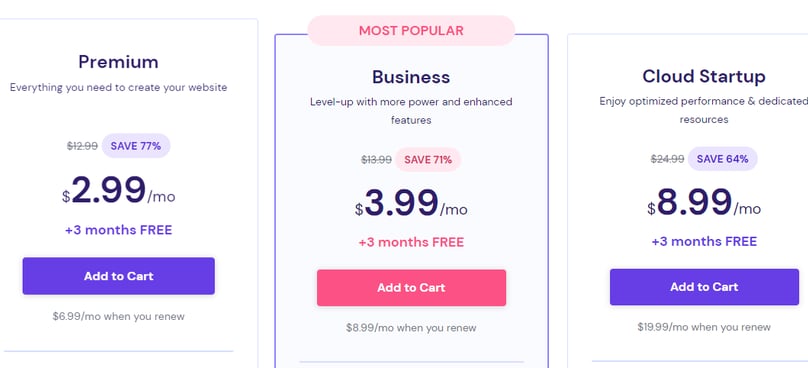
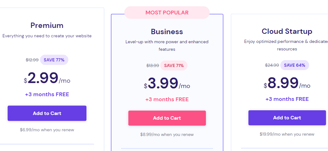
Then, select one of the options. I personally chose Business, but you can see if in your case Premium is enough. Even with Premium, you can host 100 websites, plus many more amazing features!
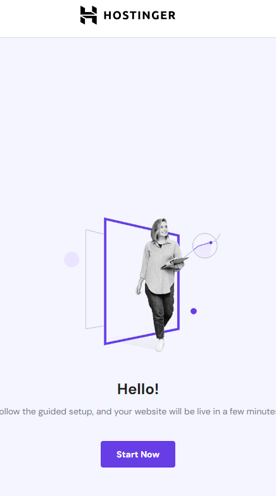
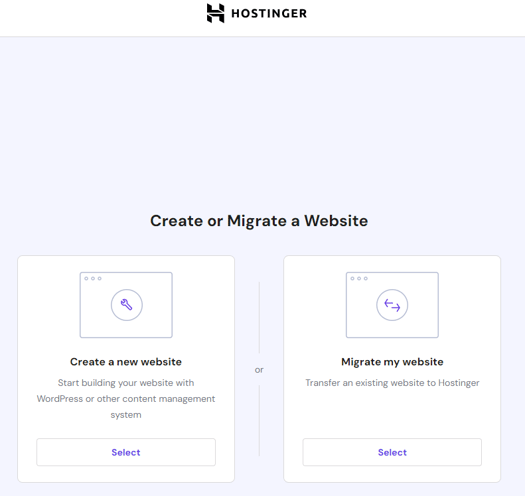
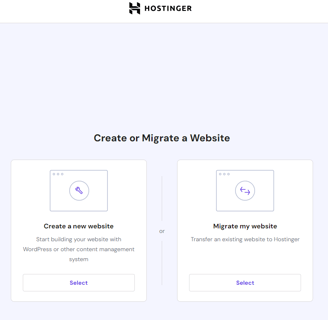
Once created your account and paid for the plan you chose, you'll have an interface as in the image on the left. Click "Start Now", and you'll then be given the choice to either create a new website, or to migrate a website from another hosting platform.
Click on "Create a new website". Then Hostinger will propose two options: to use WordPress with AI, or Hostinger Builder with AI. You can choose either, but as I mentioned before, Hostinger is more beginner-friendly.
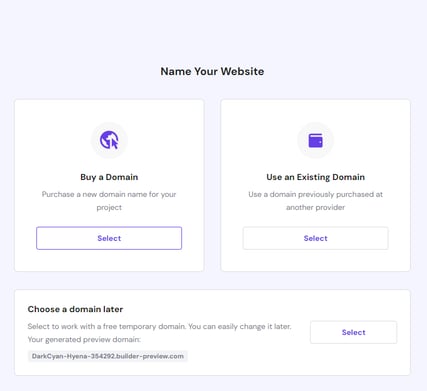
If you click on Hostinger Builder with AI, you can then buy (or claim your free domain) or use an existing domain. If it's the first time, you'll be able to claim a free domain, in case it's available.